Keeping It Minimal: HelloWorld Tutorial
If you just want to get started and make sure everything works, the Keeping It Minimal: HelloWorld Tutorial plugin is a great place to begin. It’s a complete but minimal example that shows how to structure a plugin using Poriscope’s MVC architecture.
You’ll get a new tab in the interface with a basic message and no extra logic — perfect for testing.
This plugin includes:
A View that inherits from MetaView
A Model that inherits from MetaModel
A Controller that inherits from MetaController
Once it’s in the right folder, Poriscope will automatically detect it, instantiate it, and display it as a new analysis tab.
Inside the HelloWorld Analysis Tab Plugin
The model handles data and backend logic. In this example, it’s empty — just enough to satisfy the required interface.
import logging
from utils.MetaModel import MetaModel
from utils.LogDecorator import log
from scipy.signal import welch
import numpy as np
from PySide6.QtCore import Signal, Slot, Qt

class HelloWorldModel(MetaModel):

    logger = logging.getLogger(__name__)

    @log(logger=logger)
    def _init(self):
        # No setup needed yet
        pass
The view handles the layout and user-facing elements. In this minimal example, we just show a label.
from PySide6.QtWidgets import QLabel, QVBoxLayout
from utils.MetaView import MetaView

class HelloWorldView(MetaView):
    def _init(self):
        pass

    def _set_control_area(self, layout):
        # This is where you'd add controls (e.g. buttons, dropdowns)
        label = QLabel("Hello, world!")
        layout.addWidget(label)

    def _reset_actions(self):
        # Reset custom state if needed
        pass

    def update_available_plugins(self, available_plugins):
        # Update logic when new plugins are available
        pass

   def update_plot():
       # Update plot
       pass
The controller connects the view and model. It’s where you manage logic, signals, and data flow between them. Right now, it’s just the bare minimum.
import logging
from utils.MetaController import MetaController
from PySide6.QtCore import Slot, Signal, Qt
from plugins.analysistabs.HelloWorldView import HelloWorldView
from plugins.analysistabs.HelloWorldModel import HelloWorldModel
from utils.LogDecorator import log
import csv
import pandas as pd

class HelloWorldController(MetaController):

    logger = logging.getLogger(__name__)

    @log(logger=logger)
    def _init(self):
        self.view = HelloWorldView()
        self.model = HelloWorldModel()

    @log(logger=logger)
    def _setup_connections(self):
        # This is where you'd connect signals and slots between view and model
        pass
Together, these files make up a minimal but complete plugin.
Plugin File Structure
Make sure your plugin is stored in a directory like this:
plugins/analysistabs
├── HelloWorldView.py
├── HelloWorldModel.py
└── HelloWorldController.py
Poriscope will pick it up automatically if your plugin loader is set up properly.
What You’ll See
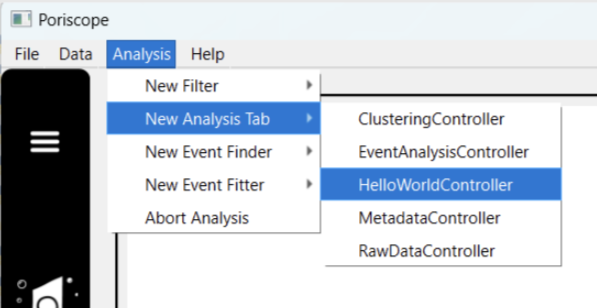
HelloWorld in the Analysis Menu — Once the plugin is loaded, it appears as a selectable tab in the analysis menu.
Once the plugin is loaded, you’ll see a new tab with the message in the control area:
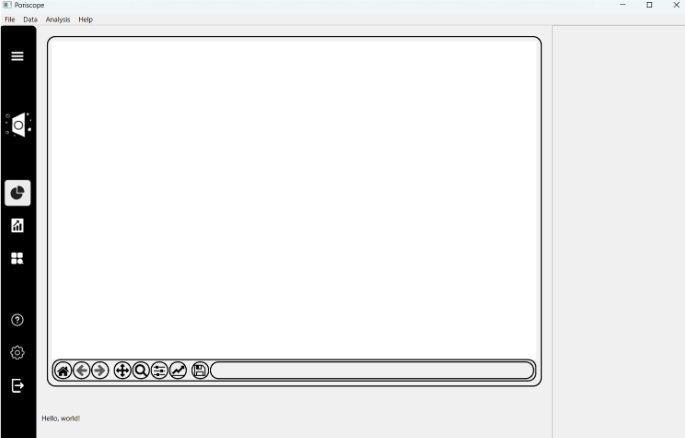
HelloWorld Tab in Action — The message “Hello, world!” appears in the control area of the view.
Hello, world!
This confirms that your plugin was discovered, initialized, and displayed correctly.
What to Do Next
Now that you’ve got a working template:
Add your own controls to
_set_control_areaWrite your own logic in the model
Connect everything in
_setup_connections
You’ve now built your first plugin. From here, you can grow it into anything you need.
Note
If you’re new to PySide6 widgets and layouts, pythonguis.com is a great place to start.